Flow lifecycle & testing
Testing your unpublished flow
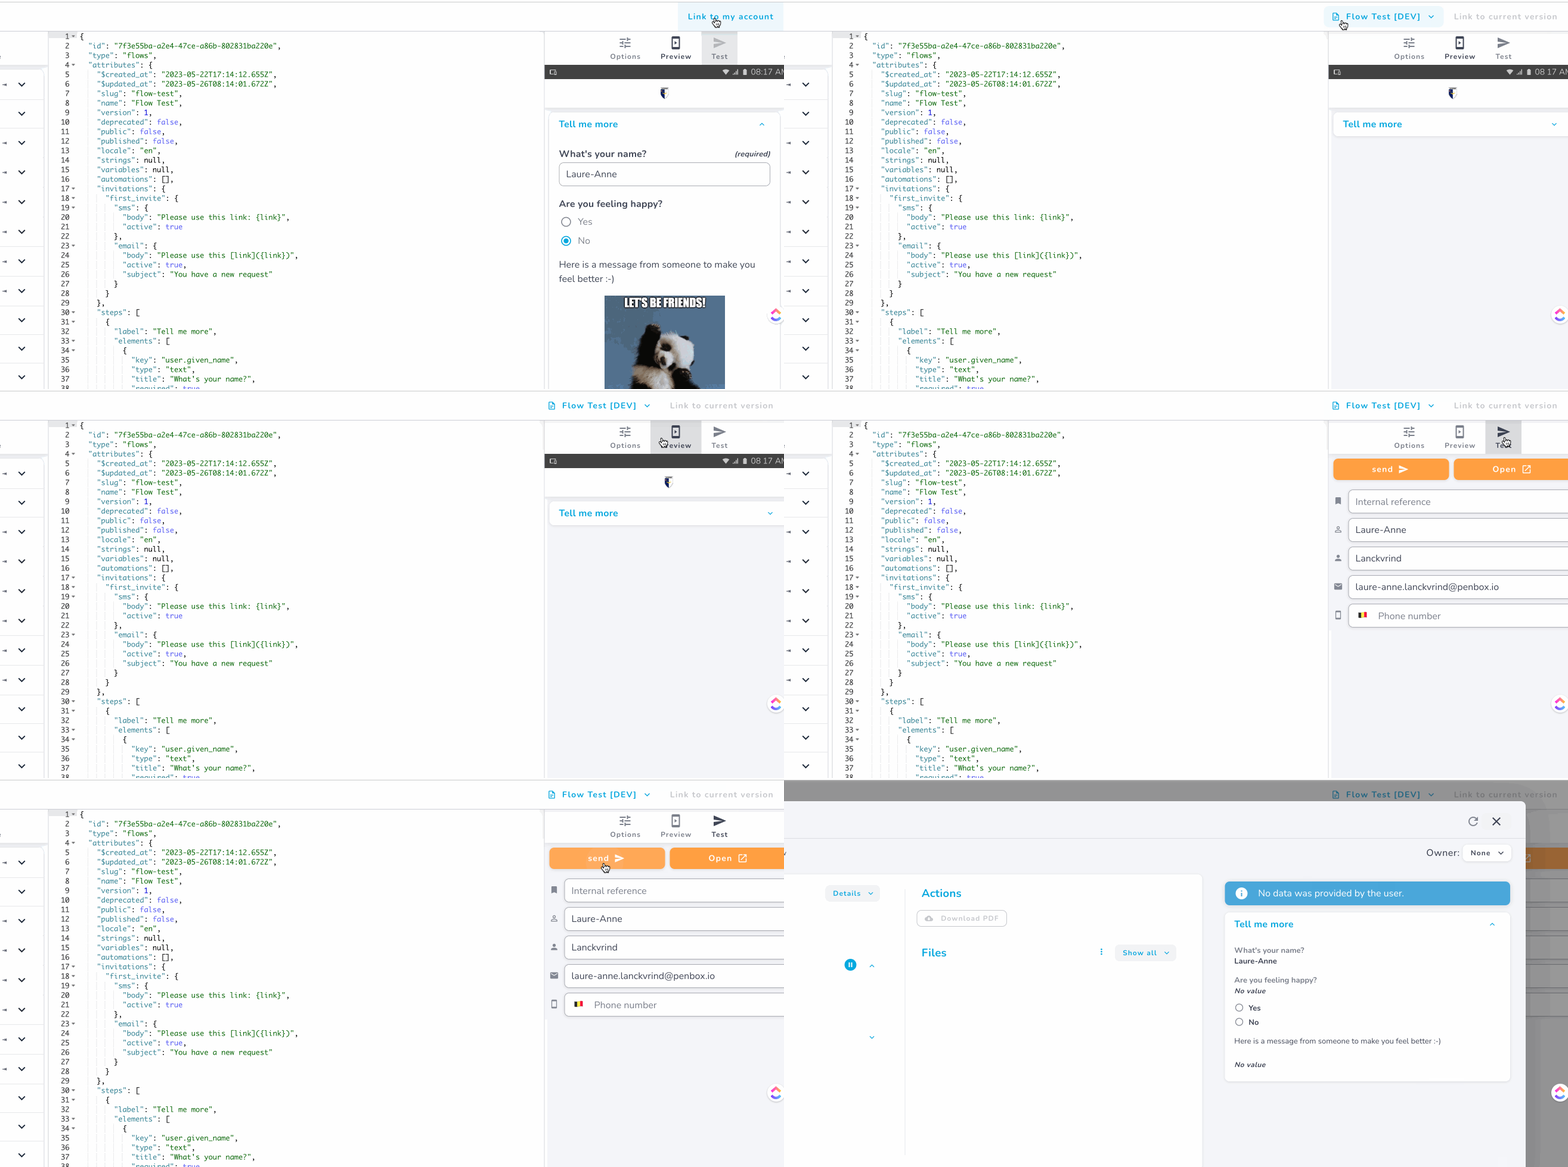
To test your flow outside the previewer of the Studio, you need to create a Flow customisation (cf. previous chapter about concepts & entities).
To do so:
- Click the button
Link to my accountat the top right of the screen when you're in the Studio - You see that the flow v1 you create is now linked to the flow customisation
Flow Test [DEV] - Click on the tab 'Test'
- Fill in the contact information that will be used when testing the flow
- Click on 'Send' if you want to send a test request to the contact info as mentioned at point 4. Or click on 'Open' if you want to test the flow in a new browser tab.

Publishing your flow
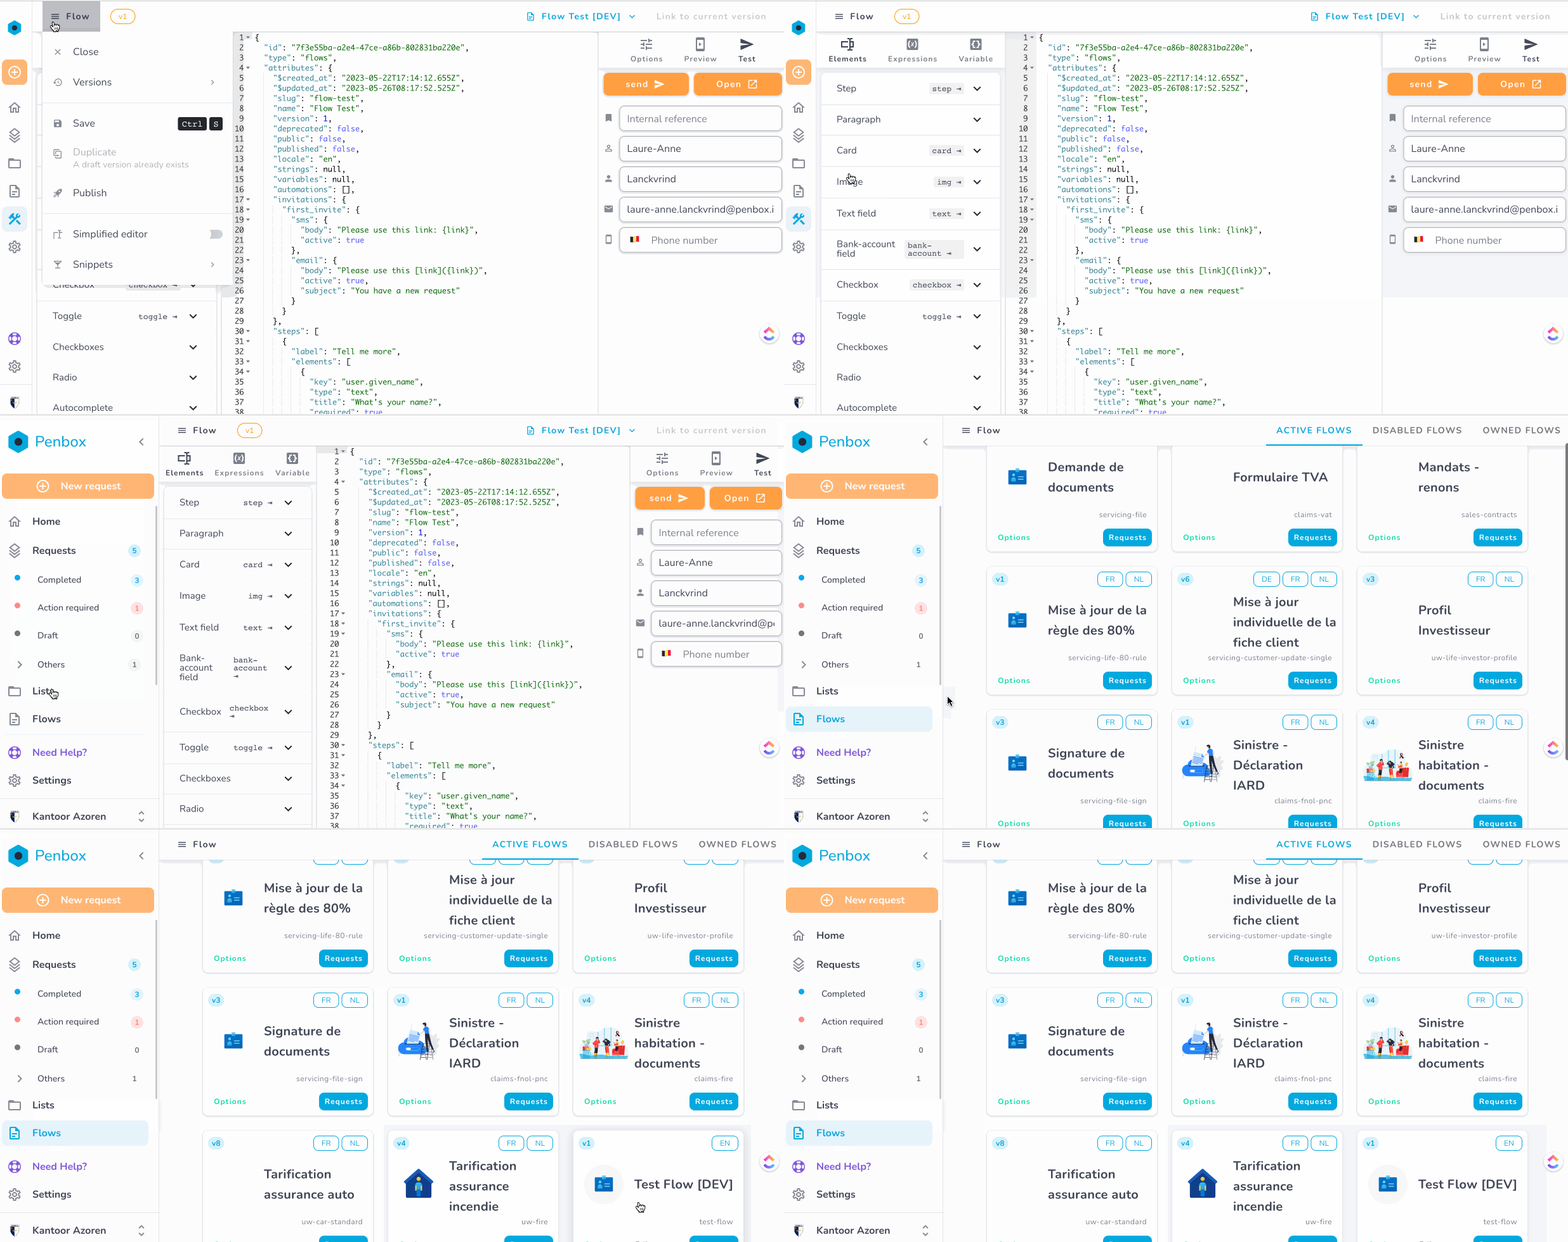
To make your flow usable by a real pen-user, you need to publish it.
- Go to the
Form menuat top left of the screen when you're in the Studio v1 - Click on 'Publish
- Click on the Penbox logo in the top left to make the Penbox menu appear
- Click on 'Flows'
- Your newly published flow should be visible next to the other flows that are available in your workspace.

Now your flow is finally available in production and ready to be used !
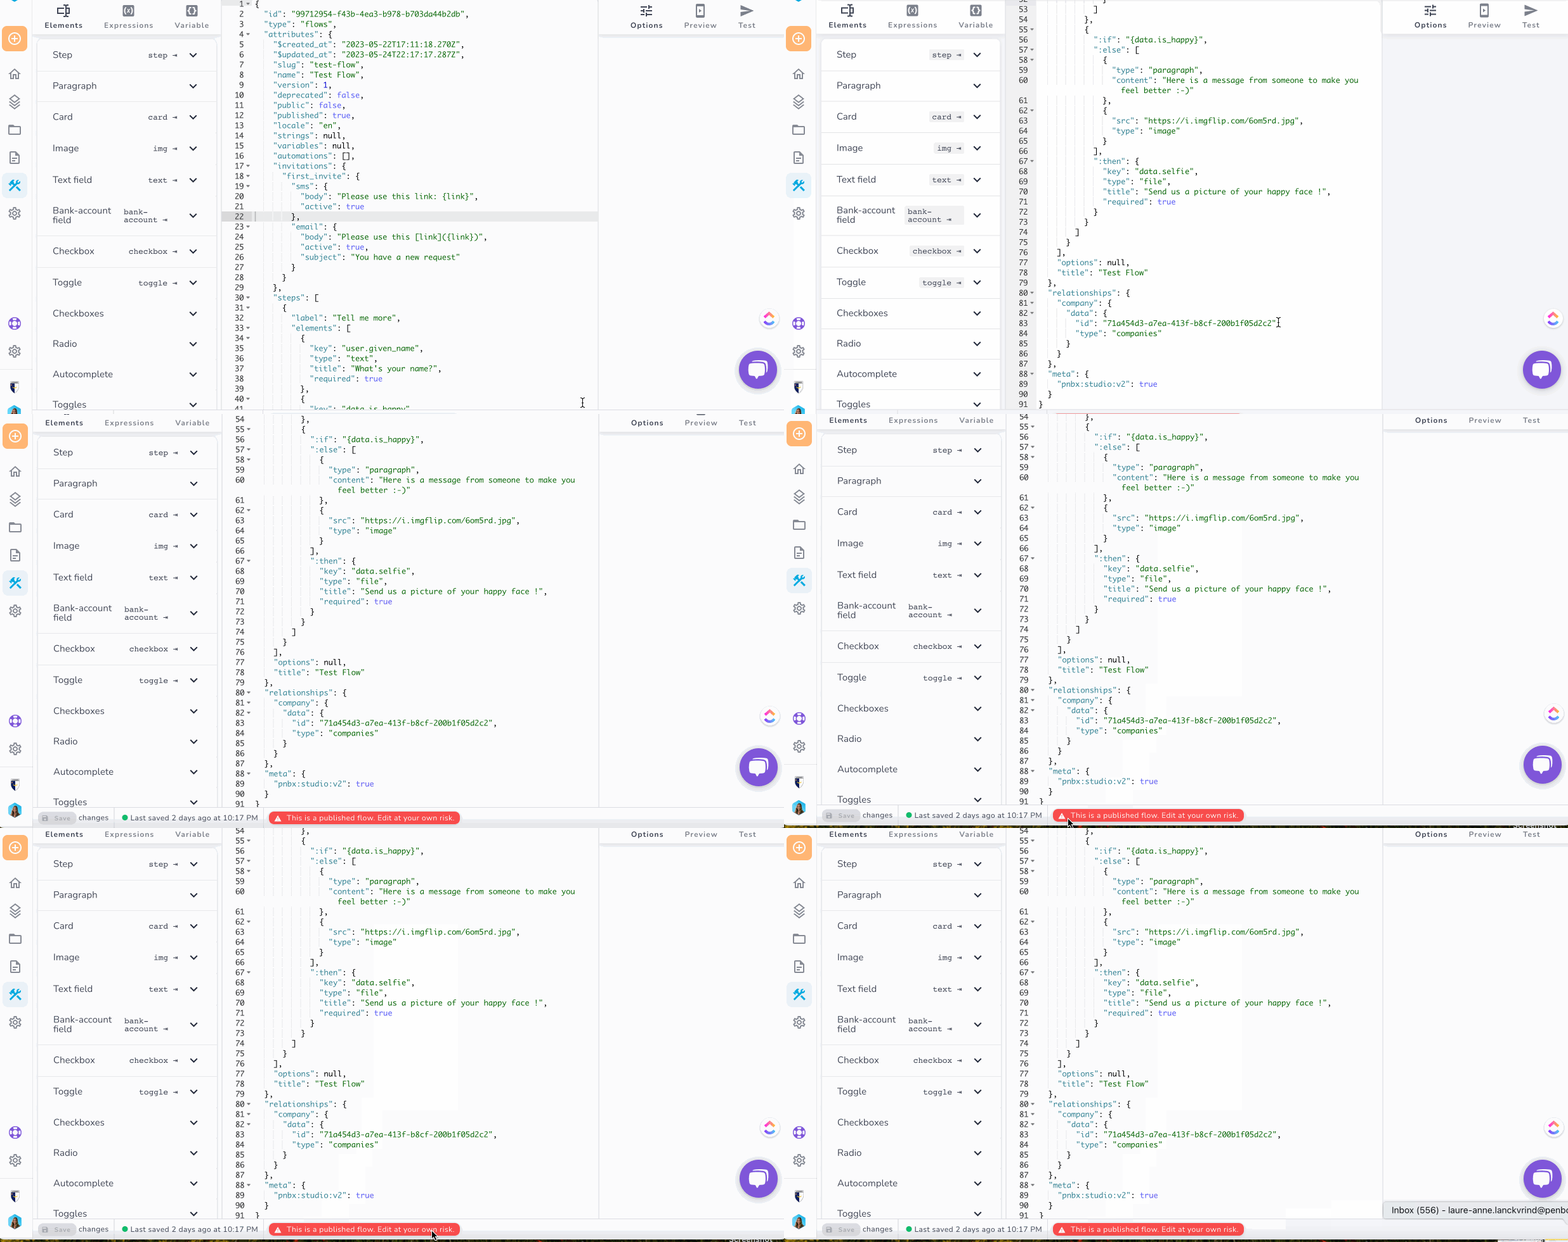
Remark
You're easily able to determine if your flow is published or not by looking at the bottom center of the screen when you're in the Studio. This is the message that is shown when the flow is published :"This is a published flow. Only edit at your own risks.".

Creating a new version of your flow
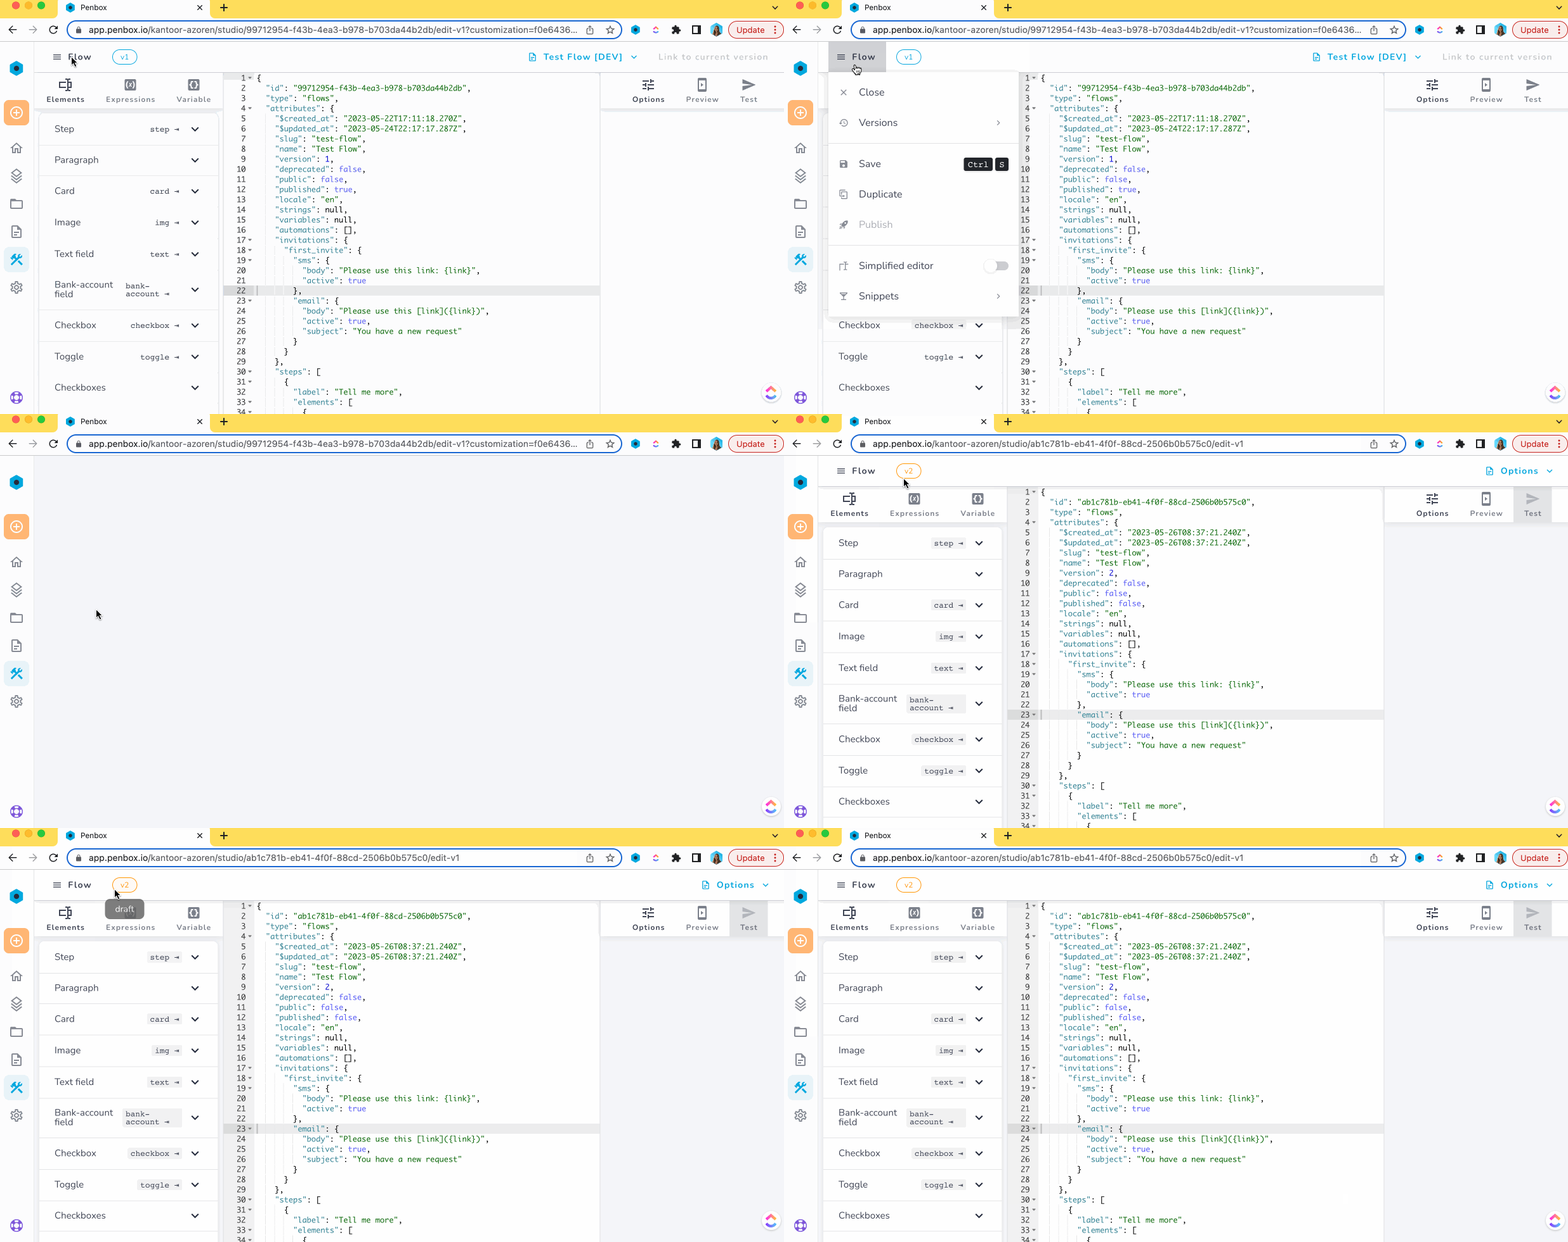
To modify a flow already published, it is a best practice to create a new version of the flow to ensure backward compatibility.
- Go to the
Form menuat top left of the screen when you're in the Studio - Click on 'Duplicate'
- Now a version 2 of the form has been created in
Draftmode. - You can easily determine the version you're editing as it is shown next to the
Form menu

Updated 8 months ago
What’s Next